内容提要:文章介绍photoshop 局部调亮案例,使用色阶和曲线命令进行整体光线的调整。
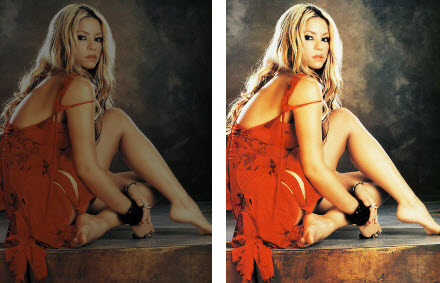
本文案例中photoshop局部调亮主要使用到色阶和曲线命令。左边图像偏暗,右边是局部调亮的效果图。
下面,随笔者的步骤一起学学photoshop局部调亮操作:
1.将背景图层拖曳到图层面板下面的“新建图层”按钮上面,得到“背景 副本”图层。
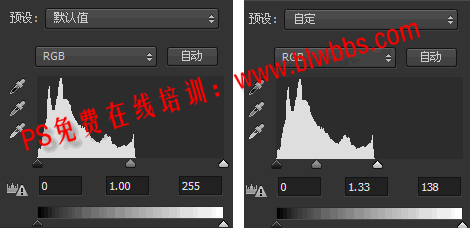
2.新建色阶调整图层,从色阶上面的直方图可以看到从133-255区间的像素值为空白,因此图像偏暗。相应的操作就是将白滑块从255往左边移动,直到移动到差不多有像素的地方,大概在138即可。再将中间的灰色滑块向左边移动到1.33左右,增加图像的亮度。
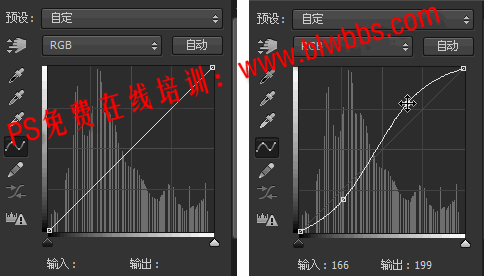
3.我们需要得到的效果是人像亮,背景暗,因此将曲线调整为S型,增加明暗对比度。
4.新增一个自然饱和度调整图层,稍微调整两个参数的值,使整个画面更加自然。
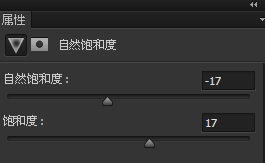
关于自然饱和度的详细介绍请阅读文章:http://www.ittribalwo.com/article/2140.html
到此,photoshop 局部调亮案例就制作完成了。