内容提要:本文分享用PS滤镜制作小雨效果特效,有详尽的PS下雨效果制作步骤和练习素材提供.
对刚接触学习PS的伙伴,对做一些特效非常感兴趣,比如说用PS制作下雨效果。
下面我们通过案例来分享用ps怎么做下雨效果。
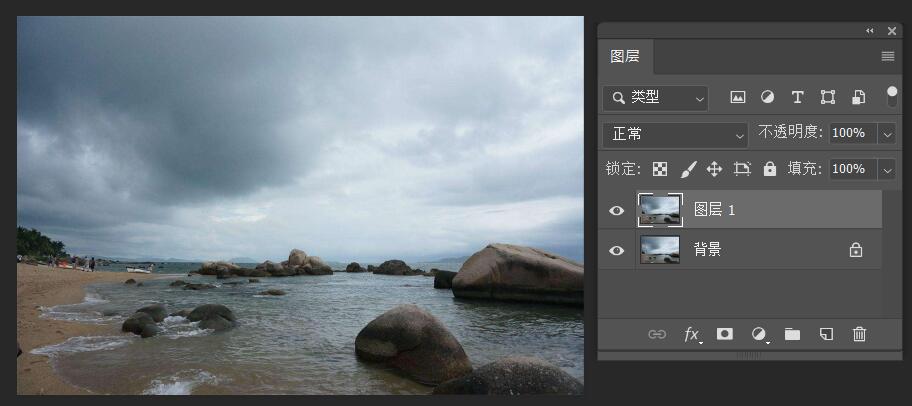
第一步,在Photoshop软件里面打开需要制作下雨的素材图片。如果你需要素材图片和视频教程,请在QQ群:553281253下载。
第二步,按下CTRL+J,复制素材背景图层。
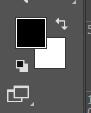
第三步,按下D键,将PS的前景色和背景色,恢复为默认的前黑后白。
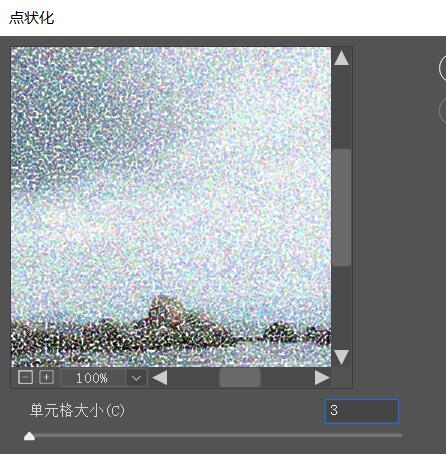
第四步,滤镜——像素化——点状化,将单元格大小设置为3,单击确定。单元格数字设置越小,雨就越细。
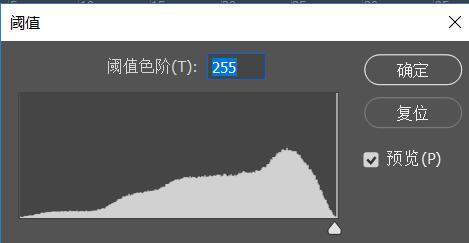
第五步,执行:图像——调整——阈值,将数值变为最大值,图像将变纯黑白。
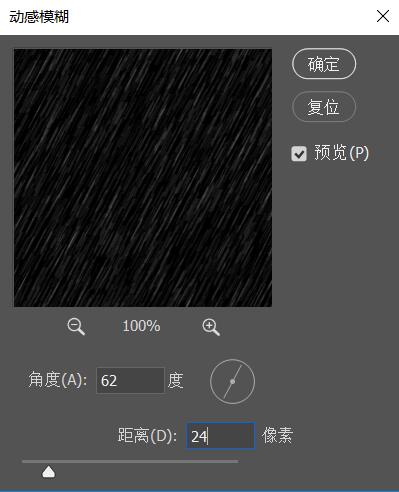
第六步,执行:滤镜——模糊——动感模糊,设置合适的参数值即可。
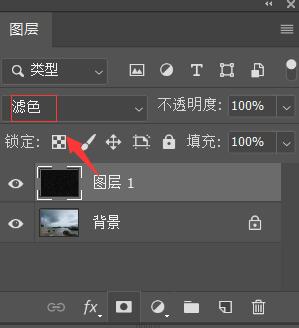
第七步,将图层1的图层混合模式设置为:滤色。
我们预览一下原图和效果图对比:

原图

效果图
到此,使用PS滤镜制作下雨效果就结束了。当然,我们还可以将雨动起来,那将会使用到PS里面的时间轴来做动画。具体的下雨动画效果,请访问链接阅读:http://www.ittribalwo.com/article/2207.html