内容提要:PPT动画看图
我们在查看或放映某些幻灯片时,当将鼠标放到幻灯片中的某张图片上,图片将会自动放大,当鼠标移开时,图片呈还原状态,如下图所示。这类效果我们在许多网站中浏览图片时也是非常常见。每当看到这种效果时,你有没有想到它们是如何实现这个效果的呢?

其实,这种效果利用PPT中的切换平滑和动作即可实现,那么下面就为大家揭秘把上述动画效果的操作方法。
具体操作方法如下:
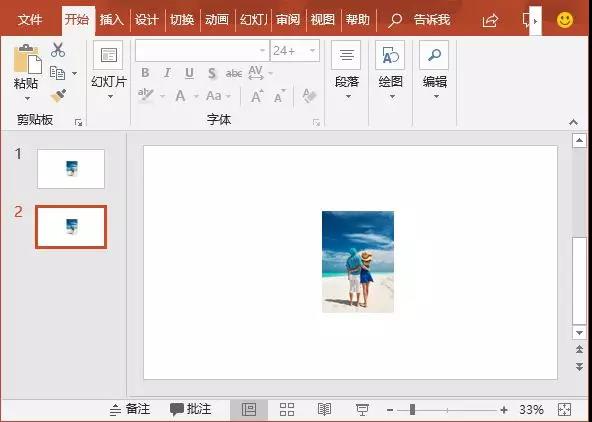
(1)打开PPT,在第一页中插入一张图片。然后按【Ctrl+Shift+D】组合键,复制一张幻灯片。
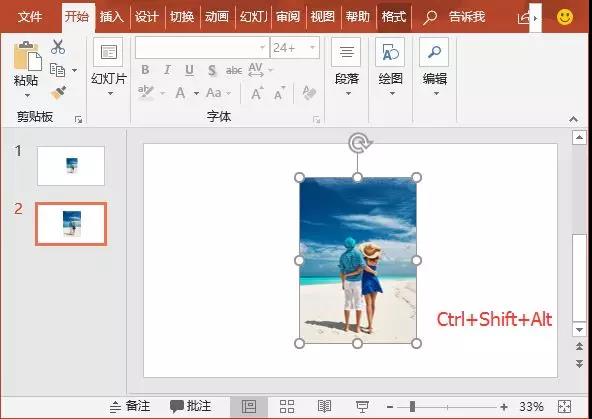
(2)选择第二张幻灯片中的图片,按住【Ctrl+Shift+Alt】键的同时,鼠标拖动图片,将图片等比例放大。
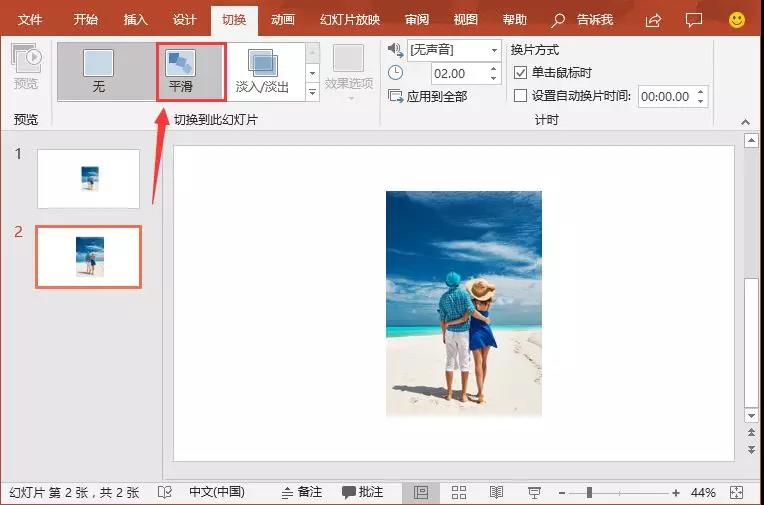
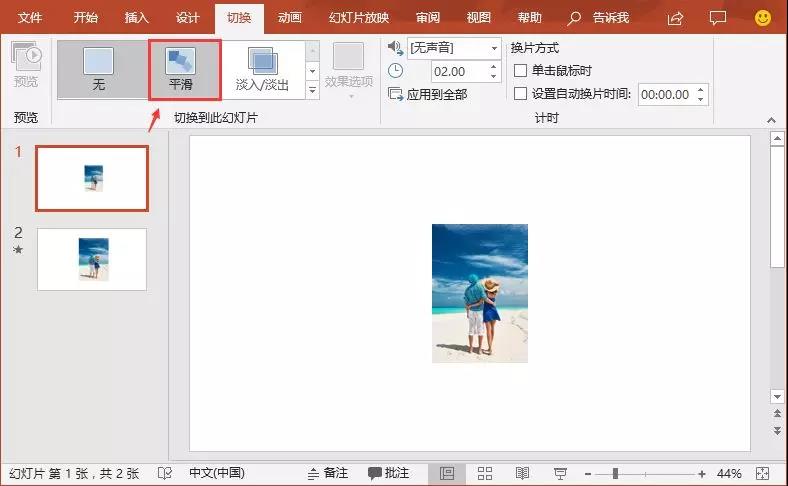
(3)选择第二张幻灯片,然后点击【切换】-【切换到此幻灯片】-【平滑】动画效果,为其添加平滑效果。
此时,效果如下图所示。

虽然图片已有放大的效果,但需要单击鼠标,图片才会放大,这与我们的最终效果悬停鼠标放大图片的效果不一致。因此,这里还差一个关键步骤。
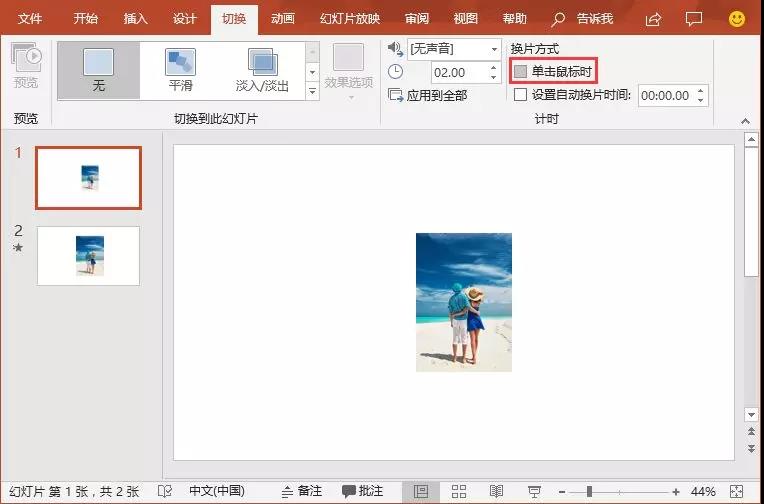
(4)选择第一张幻灯片,在【切换】-【计时】组中取消勾选“单击鼠标时”复选框。
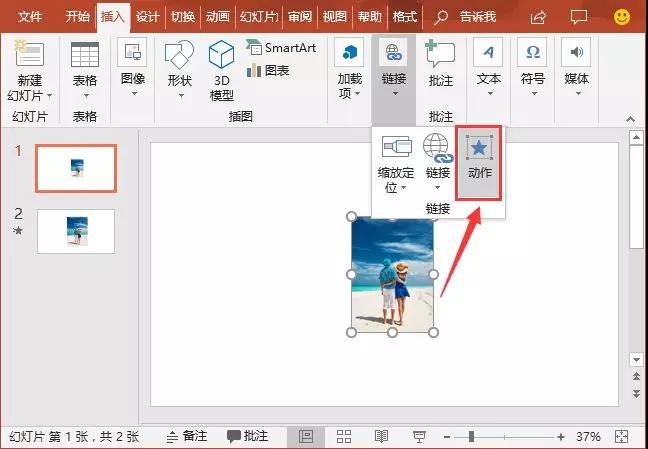
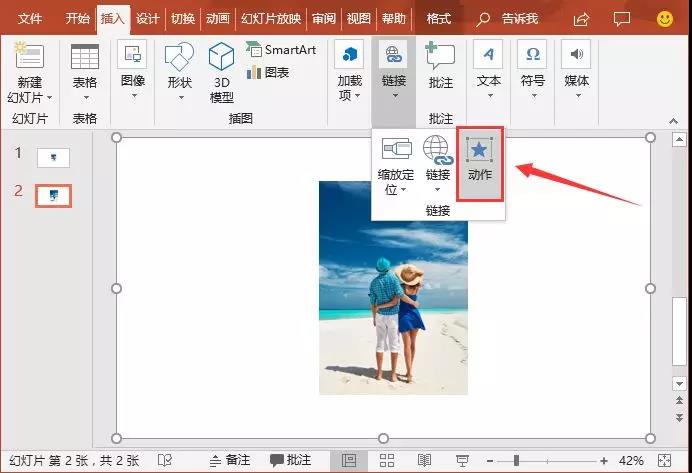
(5)再次选择第一张幻灯片中的图片,点击【插入】-【链接】-【动作】按钮。
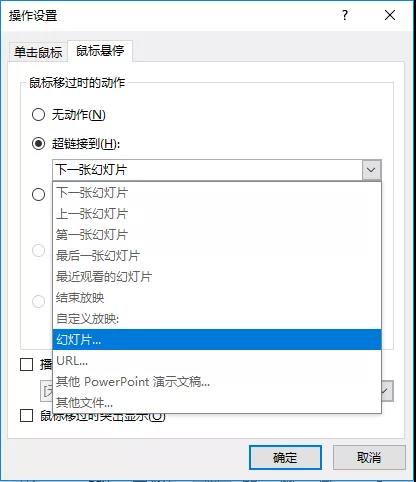
(6)打开“操作设置”对话框,选择“鼠标悬停”选项卡,选中“超链接到”单选按钮,在其下拉列表中选择“幻灯片...”选项。
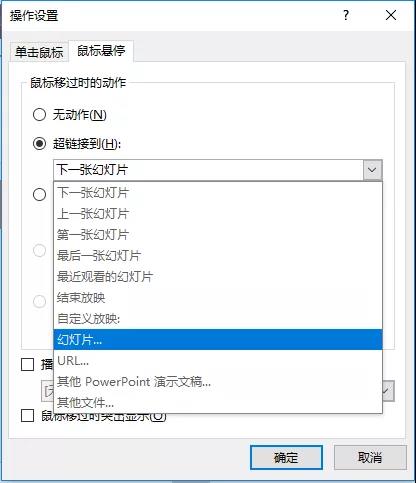
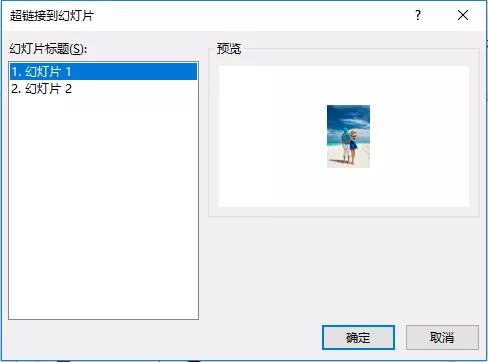
(7)弹出“超链接到幻灯片”对话框,在“幻灯片标题”列表框中选择“幻灯片2”,然后单击“确定”按钮。

此时,只需将鼠标放于图片上,图片即可自动放大。

放大之后如何自动还原呢?请继续往下看:
(8)选择第一张幻灯片,然后点击【切换】-【切换到此幻灯片】-【平滑】动画效果,为其添加平滑效果。
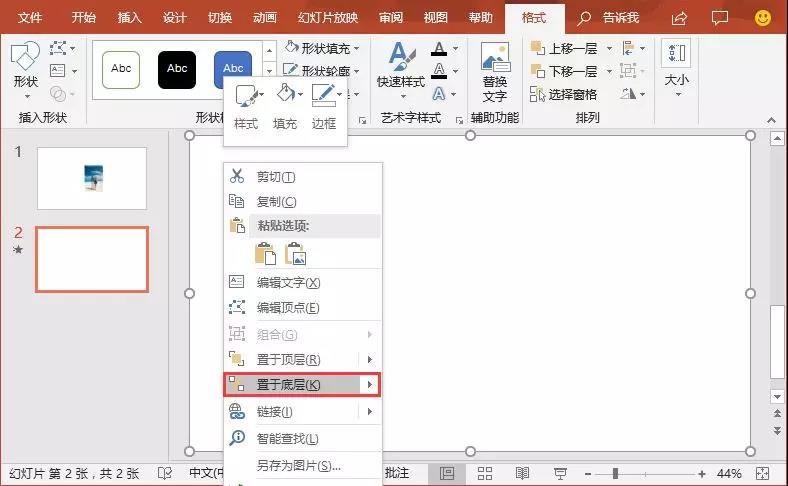
(9)选择第二张幻灯片,点击【插入】-【形状】按钮,选择“矩形”选项,绘制一个与页面相同大小的无边框白色矩形,然后右键,选择“置于底层”命令,将矩形放于图片下方。
(10)保持矩形的选中状态,点击【插入】-【链接】-【动作】按钮。
(11)打开“操作设置”对话框,选择“鼠标悬停”选项卡,选中“超链接到”单选按钮,在其下拉列表中选择“幻灯片...”选项。
(12)弹出“超链接到幻灯片”对话框,在“幻灯片标题”列表框中选择“幻灯片1”,然后单击“确定”按钮。
此时,最终效果如下图所示。

注意:平滑切换是PowerPoint 2016新增的功能之一,要想使用这个新功能,你的PPT 2016必须是升级更新的最新版本,或者是直接安装Office 365版本。
############
【爆文推荐】:
如何快速解决PPT字体丢失问题?送你4个技巧早学早预防
*#*#*
**更多好文请加入网站:部落窝教育**
************

公众号转载请联系授权!